
To understand the processes a customer goes through when making a purchase on your website or online store, you should use Pago Fácil in test mode or development mode as if you were a developer.
Although it sounds difficult, it isn't. Follow the steps in this post. And the video too, when it's available, you'll see how easy it is. Then leave me a comment to tell me how it went or if I can help you with anything else.
How to use Pago Fácil in trial mode?
First, you must have an account at Pago Fácil. An account that he normally uses to receive payments from his customers. If you don't have an account, don't worry, just click "register" and create one.
There are some important things you should know:
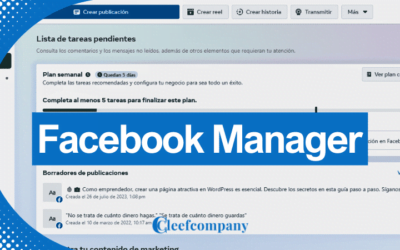
There are two types of Dashboard or Cpanel that you can access.
- The first, This is where you normally configure all the settings in your easy payment account.
- The second It is in the test environment.
The main difference between the two is the type of bond.
- Dashboard or cPanel in normal form, link: https://dashboard.pagofacil.cl/
- Dashboard or cPanel in the test environment, link: http://dashboard-dev.pagofacil.cl/
The other information you should know is that I will be using a test credit and debit card.
Enough with the theory, although it was important, let's get to the practical side.
The steps to follow to use trial mode in Pago Fácil
Go directly to the test environment link http://dashboard-dev.pagofacil.cl/
If you don't already have a trial or development account, they will ask you to upload a personal photo or selfie and also upload both sides of your ID card one by one.
If you're having trouble being recognized in your photo by the system, simply contact an Executive directly via the Easy Payment Chat. They will assist you with the verification process after you send them the photos.
Once everything is ready, they will verify your identity.
Enter your email and password for your Pago Fácil account or the account you created previously.
Click on “My Services”.
Click on “View More” and then scroll down to the “List of Payment Buttons” module.
Copy the “Payment URL” link and paste it into your browser to begin the trial payment process.
Once you have pasted the link, you must enter the details and click on pay.
You'll see all the available payment options (Webpay, Multicaja cash, and many more). Select a payment method and follow the payment process. In this case, I'm going to use Webpay Plus.
Select credit card and enter the card details: card number, expiration date, and 3-digit code.
Here is the information on test cards so you can use it as well:
VISA Credit Card
Card Number: 4051885600446623
Expiration year: Next year after now.
Expiration month: Any month.
Security code: 123
For Redcompra VIS CardA
Card Number: 4051885600446623
Other debit card numbers to consider are: 12345678.
Next, click "Continue", accept the no-quota option and "Continue" again.
Enter number RUT: 11.111.111-1 and Key: 123. Then click on “Accept”.
Once you complete the steps, it will tell you that your payment was successful.
If you have a page to thank the customer once they complete the purchase, the customer will be automatically redirected to your website after a few seconds and the purchase will be considered complete.
If you need help with a specific Digital Solution, you can Contact us for advice.
Share this post and leave a comment to help us help more people
At Cleefcompany, we wish you much success, prosperity, and health!


0 Comments